The Chairmaker’s Mortise & Tenon Joint
Chairmakers live and die by their Mortise & Tenon joints. The average panel door does not get stood on, climbed by hyper toddlers or get rocked back and forth with the weight of a full grown adult perched only on the rear legs. A chair with poor Mortise and tenon joints is firewood in waiting.
I make handmade chairs (Take a look at some at https://www.tchair.org or https://www.instagram.com/rtchernis/). In order for them to survive in this harsh cruel world I have learned the crucial elements that facilitate a strong mortise and tenon joint. A well made six pound chair can support a 250 pound person and will stay strong well after the glue has failed.
A recipe for a long lasting strong mortise and tenon joint:
1. The fit of the joint. A tightly fitting joint is very important. Any movement in the joint will be exacerbated during the life of the chair. Given the variety of stresses the joint will be put under, gaps will let the tenon move and slowly work the chair apart. Surface quality is also important – a torn tenon surface will introduce slop, that again will condemn our beautiful chair to an ugly end.
2. Make moisture content work for you. The tenons are usually hyper dry. Drying can be achieved with a kiln or some other device (crock pot with sand or a wood stove, for example), while the mortises are kept at equilibrium moisture content (just their natural environmental moisture level). After the joint is fitted the dry tenons absorb moisture and swell up locking them into the mortise.
3. Use a locking groove. Some chairmakers create a shallow groove around the tenon that is filled with wood fibers from the mortise after assembly. As the tenon swells, the fibres from the mortise wall are forced into the groove locking the tenon in place. This works particularly well when mortises are drilled using a spoon bit which not only cuts a mortise but also compresses the fibers on the mortise walls, which will naturally decompress and fill the grooves over time.
4. “Sizing” with hide glue. Some chairmakers do not use glue at all, but rely on the previous three steps to achieve a strong joint. However, glue provides an added level of security. Most glues would not work well in a very tight joint, as most of the glue will get sheared off during assembly. “Sizing” is a way to use the properties of some glues to work around the shearing effect. Hide glue is a great choice for chairmaking, as it is reversible – dry glue can be reactivated with moisture. Sizing involves applying hide glue to both mortise and tenon and wiping it off, thus driving some of the glue into the fibers. When the glue is dry, a second coat of hide glue is applied. The water content of the fresh glue both reactivates the previous layer of glue and acts as a lubricant. While much of the second layer is sheared off during assembly, the first layer provides plenty of holding power. A similar trick can be used in case work – if the case is not square, drip a little water to the joints to reactivate the glue and over-compensate with a diagonal clamp.
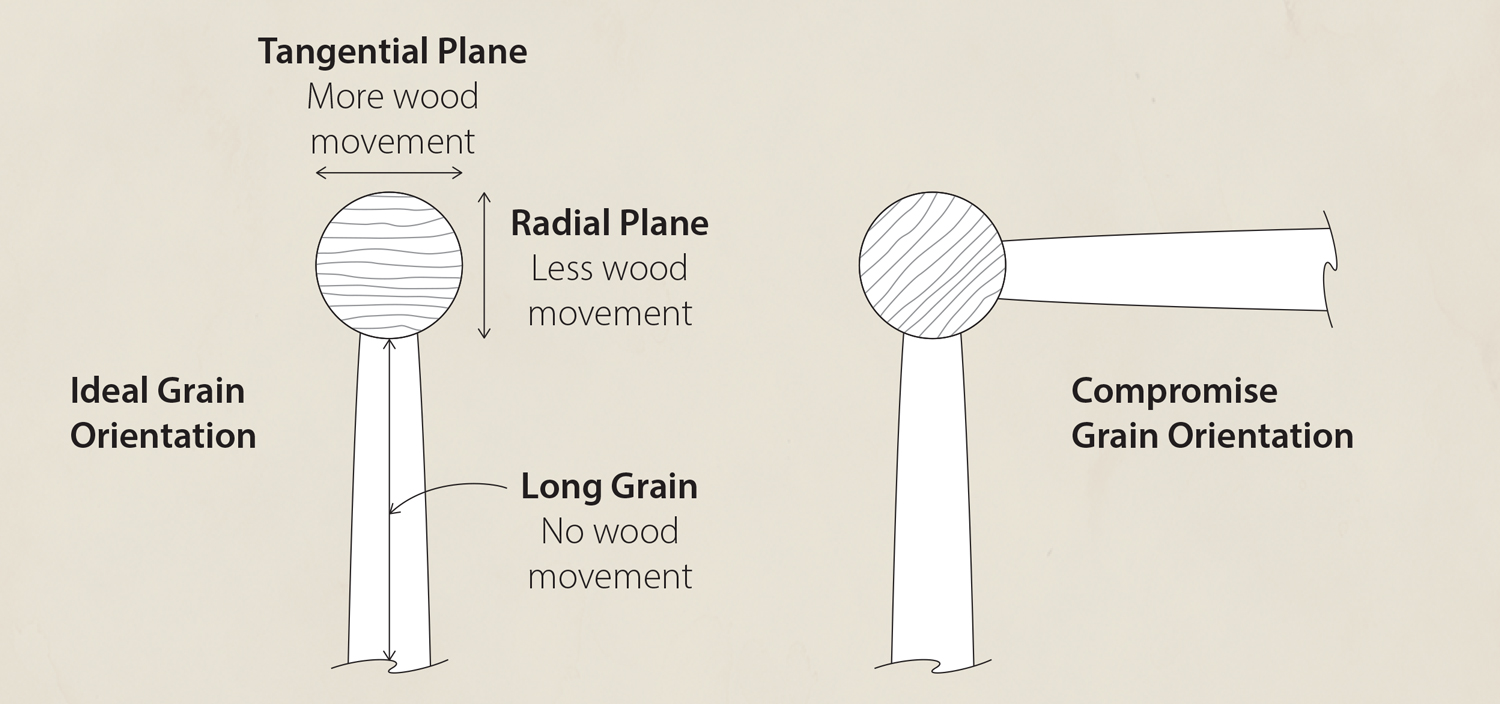
5. Grain orientation. It is important to try to align grain to synchronize wood movement as much as possible. Wood moves in the tangential plane more than in the radial plane and almost not at all in the longitudinal plane. The simple rule of thumb is to align growth rings of the tenon perpendicular to the long wood fibers of the mortice. This allows for both the mortise and tenon to move in the same direction. If you do not align the grain correctly, the parts moving in different directions will work loose over time.
I talk about some of these points in a Tip Talkvideo with Mitch Peacock https://www.youtube.com/watch?v=lJBf3wJdWCk&t=519s
—-------------------------------------------------------
Hide glue is fantastic for sizing. You can mix your own from flakes, but pre-made liquid hide glue works just as well.

—--------------------------------------------------------------
This cutaway of a mortise and tenon by Elia Bizzarri (https://handtoolwoodworking.com/) with a locking groove illustrates how it locks the tenon in place.

—------------------------------------------------------------------------------------------------------------------------
Spoon bits not only cut a clean mortise for a round tenon, but they also compress fibers on the walls of the tenon, which is perfect when using a locking groove. The bits below are available from Gramercy Tools. https://toolsforworkingwood.com/store/item/GT-SB.XX

—----------------------------------------------------------------------------------------------------------------------
Paying attention to your grain orientation during assembly will prevent tears later. See Jeff Lefkowitz’s excellent article to dig deeper on the topic - http://www.jefflefkowitzchairmaker.com/chairmakers-journal/boggs-side-chair-build-26-a-good-joint
—----------------------------------------------------------------------------------------------------------------------
Tested to destruction - You can watch a video of Dawson Moore testing a mortise and tenon with a locking groove to destruction here: https://www.instagram.com/p/CLrdxWvo5im/ . The wood fails, not the joint.

—----------------------------------------------------------------------------------------------------------------------
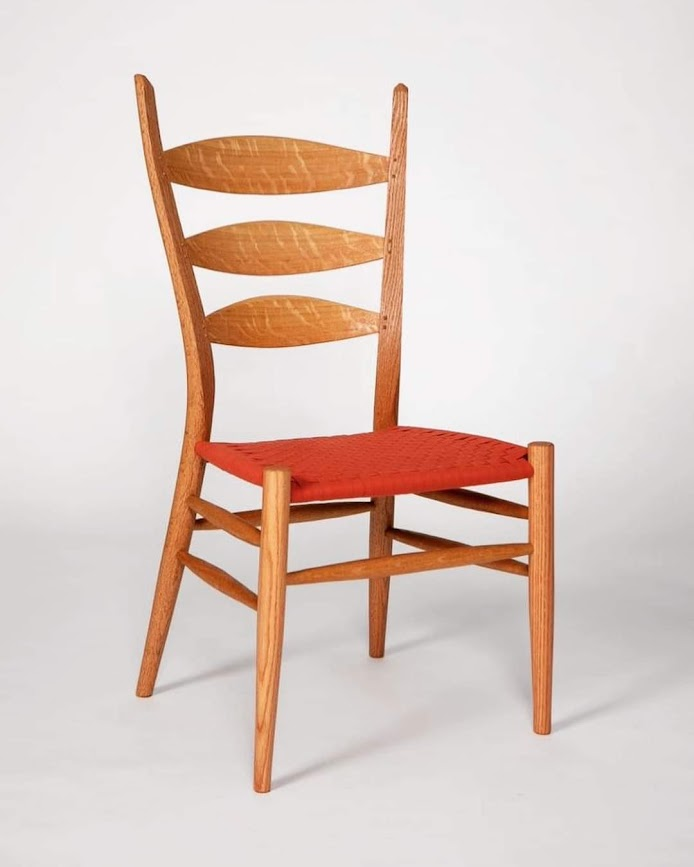
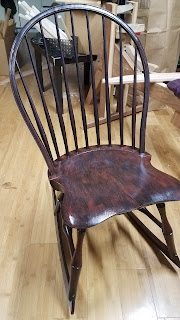
The fruit of our labour. A strong chair ready for a long happy life.

Comments
Post a Comment